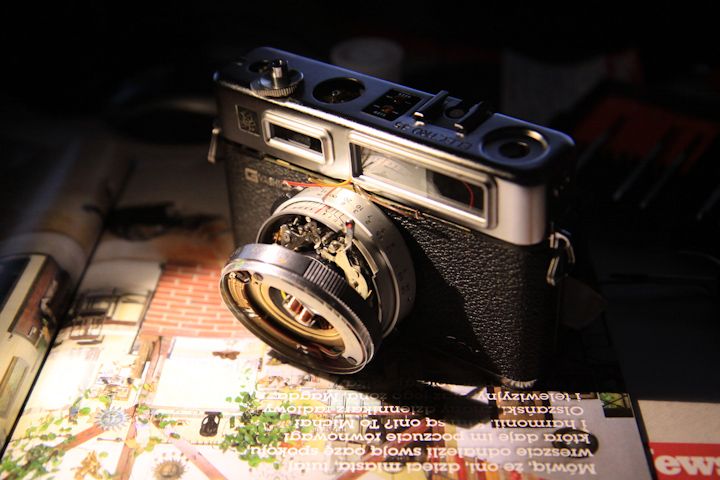
In one of the previous posts I’ve promised continuation of the report from the repairs of the Yashica Electro 35. Here it is. Below you can see the photos taken during the efforts to bring the camera to life. As you can see some vital parts had to be dismounted to get access to the vitals point for the repairs. Especially hard for me was to get a special key/screwdriver to unscrew the front lens. There are two narrow slits and you have to have a special tools to fit in. That tool costs about $35. Fortunately after the short search in the Internet I found that I can make such tool by myself with quite simple parts which I can buy in technical market. After short shopping and spending around $5 I finally had the tool to unscrew the front lens as you can see on the photos.
I’ve also managed to clean the rangefinder and viewfinder. Now it’s almost perfectly clean. I’ve also regulated the arrows displayed in the viewfinder. Now they are right in the top centre where they should be.
Here you can see also taken out the top part of the camera. I had to have access to all important wires and soldering points.
On those photos you can see the new battery check switch. The old one didn’t work, so I have to mount the new one. Unfortunately the Yashica’s switch is quite original – it’s impossible here to buy the same model. I had to buy a normal microswitch available here and mount it somehow in the place of the old one. After some thinking and preparations with use of the glue and nail file I mounted it correctly in the place of the old one. The most important here was to leave the correct space for the plastic button which pressing the microswitch after mounting the top casing. Of course the new switch have to be small enough to solder the wires to it and fit in the place of the old one. Check it on the photos below.
Here you can see the photos of the camera after the repairs and after mounting the casing back to it’s place. It’s hard to believe that it’s working and no parts left from previous state ;) . Believe me – it’s the same camera you’ve seen on the previous photos :) Photos were taken on the next day with the natural light.
With the last three photos I tried to show the clean viewfinder and correctly working the lightmeter and arrows which shows whether the film will be overexposed (red to the right) or underexposed (yellow to the left). Yellow might be showing that the times below 1/30s will be used. As you can see the viewfinder is really clean. It’s pleasure to set the focus now – believe me I have comparison to the another Electro 35 which is waiting for it’s turn to clean the viewfinder. Unfortunately there is a film inside with only 3 photos taken…
Of course as I’ve wrote in the previous post, after the test film it turned out that the aperture doesn’t change when rotating the aperture ring (wrong assembling the lens parts). Which I’ve corrected a few days ago. Now there is a film inside and new tests are under way…
As a bonus – a photo of the fixed Rolleiflex 2.8C with replaced focusing screen – taken from Yashica. Now it’s much cleaner and brighter when compared to the previous Rolleiflex’s one.


